
The Modern Interface version of working with security roles is so good that I wanted to make a post to it. It is in fact so good that when I show this to people that have worked with Dynamics for years, they often have a hard time believing how good it is. It is so good that it, alright, you get it. I really like the new security role interface. But first, a couple of things that needs to be addressed.
Direct user Access & Team Privileges Worth mentioning is that I will not be exploring team only security in this post. I will save that for a later post as this deserves its own separate post to fully explain.
Preview feature alert Another thing that needs to be said is that the current interface is shown as a preview. This does not mean that you won’t be able to work with security using the modern interface in the future, but some buttons might change position or name. Everything we will work with in this post can be done in the classic interface as well. Unless the Power Apps team is planning a major transformation of security roles then everything covered in this post will be valid for a long time. And seeing as this is used as the basis for security for many enterprise companies, I don’t foresee any significant changes to the security setup any time soon.
So, with all that our of the way, let’s get started with the post.
Creating a new security role
You are of course using the new maker interface and not using classic mode.
So here it two different ways of accessing the security roles to make sure you get the new and improved interface:
Through the admin center
To access the modern interface for security roles, you can either create a new one from your solution, or go through the admin center which you can do here:
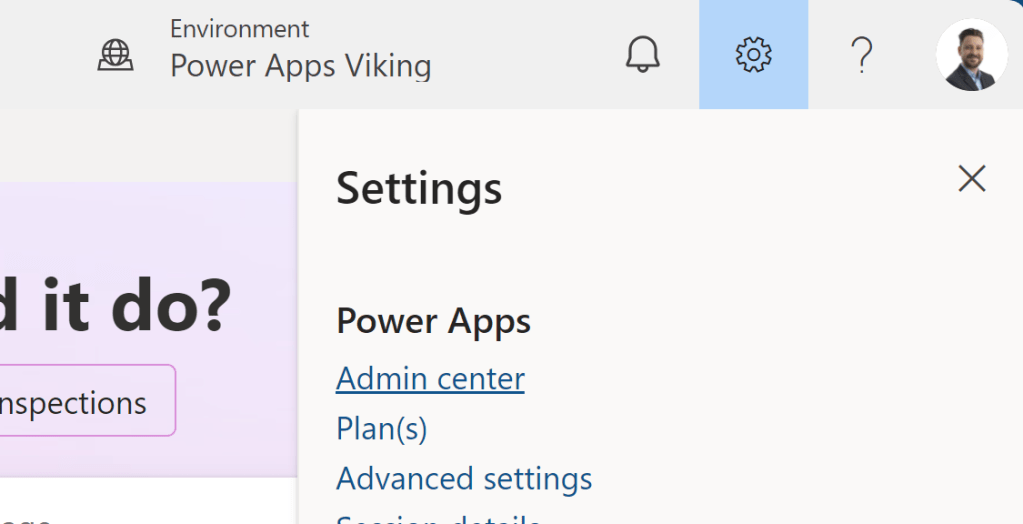
Go to the settings for you environment

Then under Users + Permissions you select “Security roles”
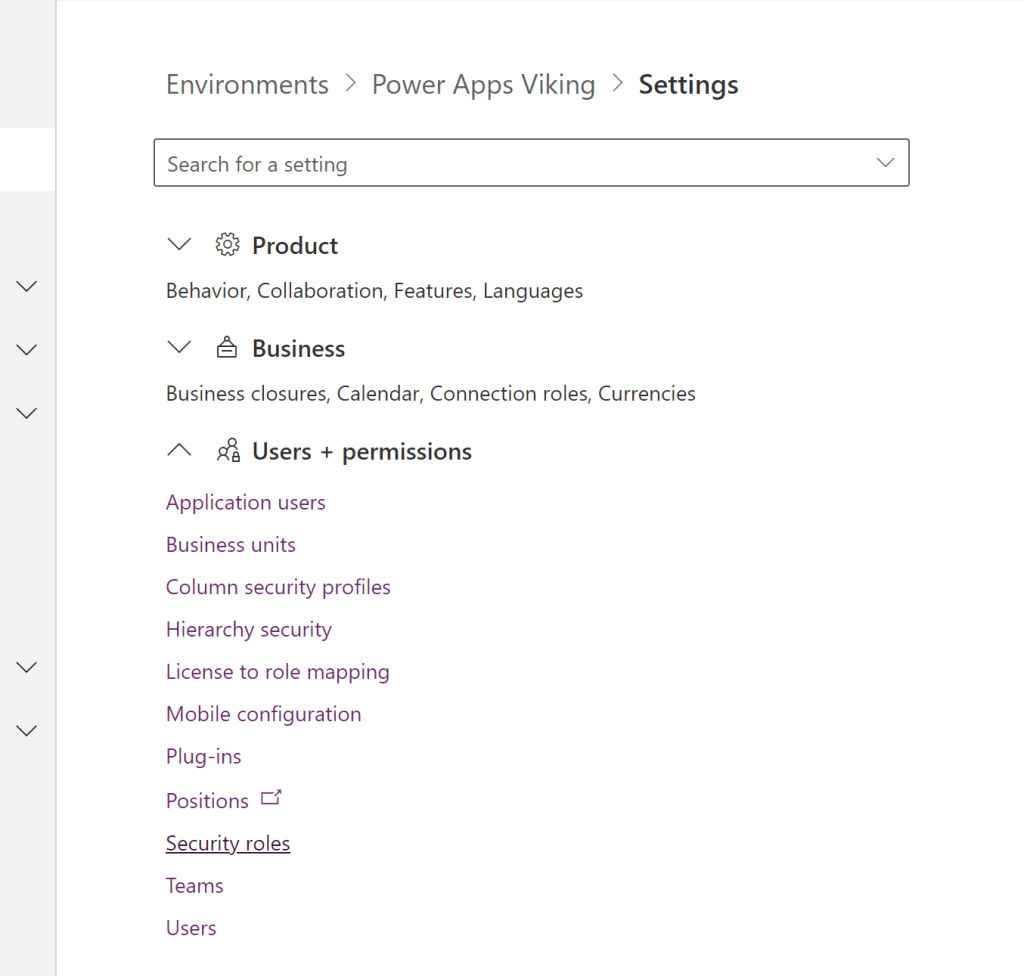
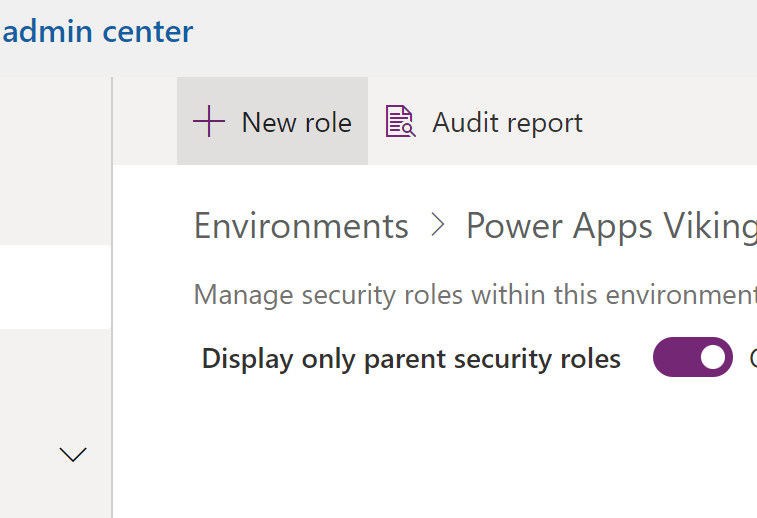
Here you can create a new role
Through the solution in the maker portal
The alternative, and the one I prefer, is to go through the solution.
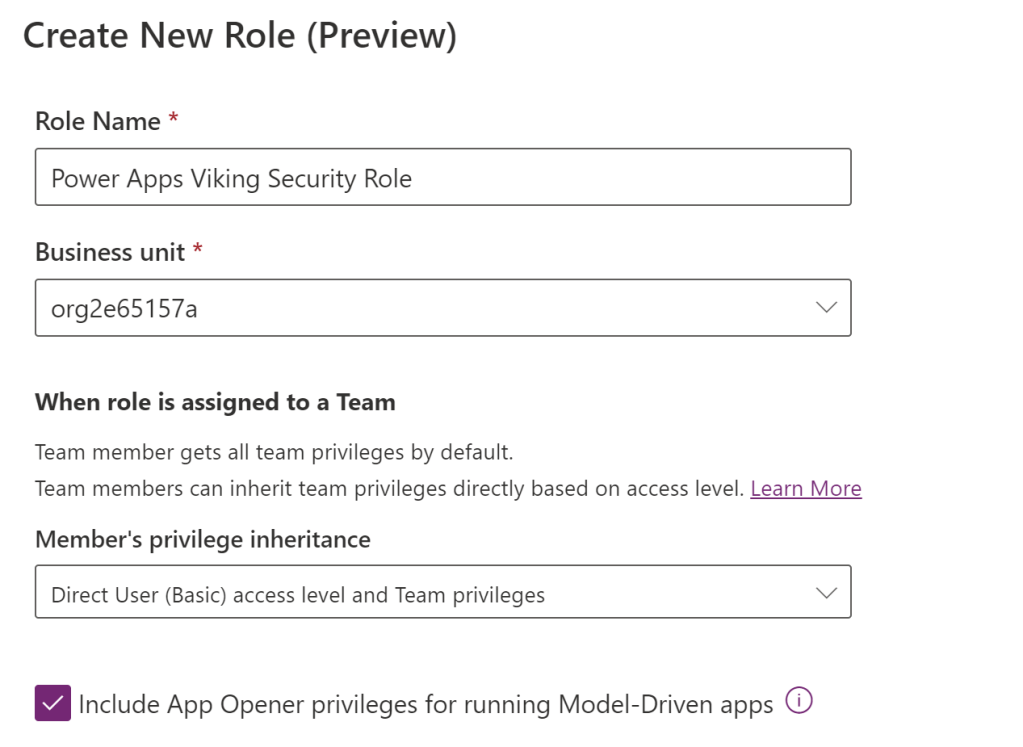
Let’s say that you need to create a completely new security role from scratch. This will be done through the maker interface by navigating first to your given solution and then creating a new role. By selecting “New > Security > Security Role”

From here you want to give the security role a name and select which business unit the security role belongs to. The reason for selecting a business unit is that you can divide different roles into different units. I see this done in very few actual cases as security is usually synchronized with Entra ID groups, instead of a company managing the organization in dynamics as well, but the use case still stands. Also, be aware that you cannot include a security rule belonging to a child business unit in your solution. This is because the business units are unique for each environment. The Security role therefore needs to be created on the parent business unit level. You will still be able to enact security on the business unit level, but you will need to manage the business units on the individual environments.
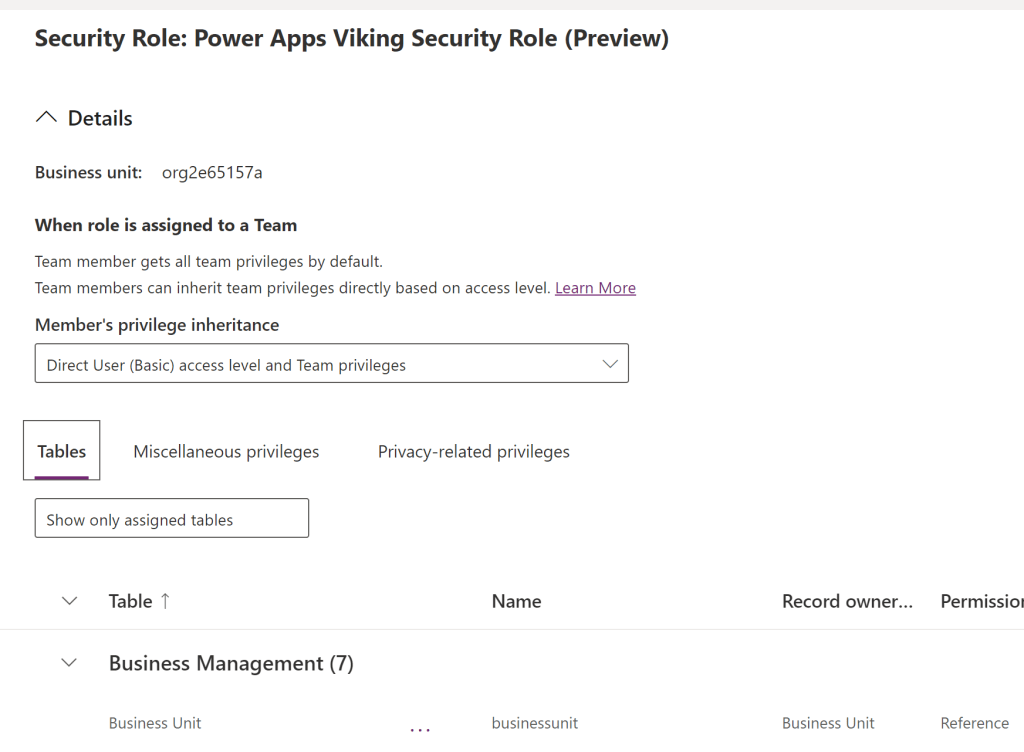
Security Role interface
Now. This is where things get really interesting. Let’s start with comparing it to the old interface. In the classic interface you would have to navigate a series of different tabs, divided into categories that are pretty foreign for most people working with just Power Apps as a citizen developer.
Instead, we start with a focus on arguably the most important aspects of security, which is tables in 99.9% of the cases I know of.
There are three main tabs. Tables Miscellaneous privileges, and Privacy-related privileges
When looking at the tables you haven’t lost the ability to discern tables in the same way as before, they will still be categorized by the categories you know from before, such as Core Records, Business Process Flows, etc
Interacting with tables in a new way
Let’s focus first on the table permissions and how we interact with them
There is a menu below “tables” which is by default set to “Show only assigned tables” where you select between All tables, assigned tables and unassigned tables. If you have created a new app with completely new custom tables, you will find them under the “Unassigned tables” view.
However, unlike the classic interface, you don’t need to start either scrolling or using ctrl + f to find you table of choice. You can simply use the search in the top left corner to find the exact table you need and clear all others from the interface.
So, let’s say you wanted to work with a table you created to manage your inventory of boats. So you would go to either all tables or the unassigned table overview and search for “boat” in the top left corner and it would provide all tables with that name, including potential business process flows if you had any with the same name as well.

Now we are ready to work with the different access levels. You can actively filter which coloumns (privilege types) you want to view, as some might be completely irrelevant to you.

In this example I removed Record Ownership, Permission level as well as Assign and Share. When you have selected the relevant columns, we find the, in my opinion, best feature of the new interface. The ability to select privilege in a logical and straightforward way:

Gone are the days of clicking the exactly right number of times to hit the “Organization” or “User” level only to miss it and having to cycle through the process another time.
You are now able to just select the levels in a dropdown and see them explained directly for each column (privilege type), for each table. This is perhaps a source of 90% of the issues people had with security before, where the previous interface simply lacked the transparency of being able to adequately see what type of privilege was given for the table you actually wanted to change.
Honestly this is, for me at least, a major upgrade and also just really the only logical way to work with this. Clearly seeing and understanding the types of privilege added for a specific table in a security role, should not have been handled through legends previously used, but stated clearly for all users to understand intuitively.
I’ve mentioned some of it in a YouTube video shortly previously. And if you want to know more about the privilege types and access levels then I have another post coming in a few days about just that.
In that post I will cover the topics mentioned above as well as some day-to-day scenarios for when you would want to use the different roles.

Leave a comment